Facebook Badge
Followers
Powered by Blogger.
Friday, May 27, 2011
 New tutorial "ATTITUDE" featuring Gary Rudisill's Art
10:30 AM | Posted by
Joanie |
Edit Post
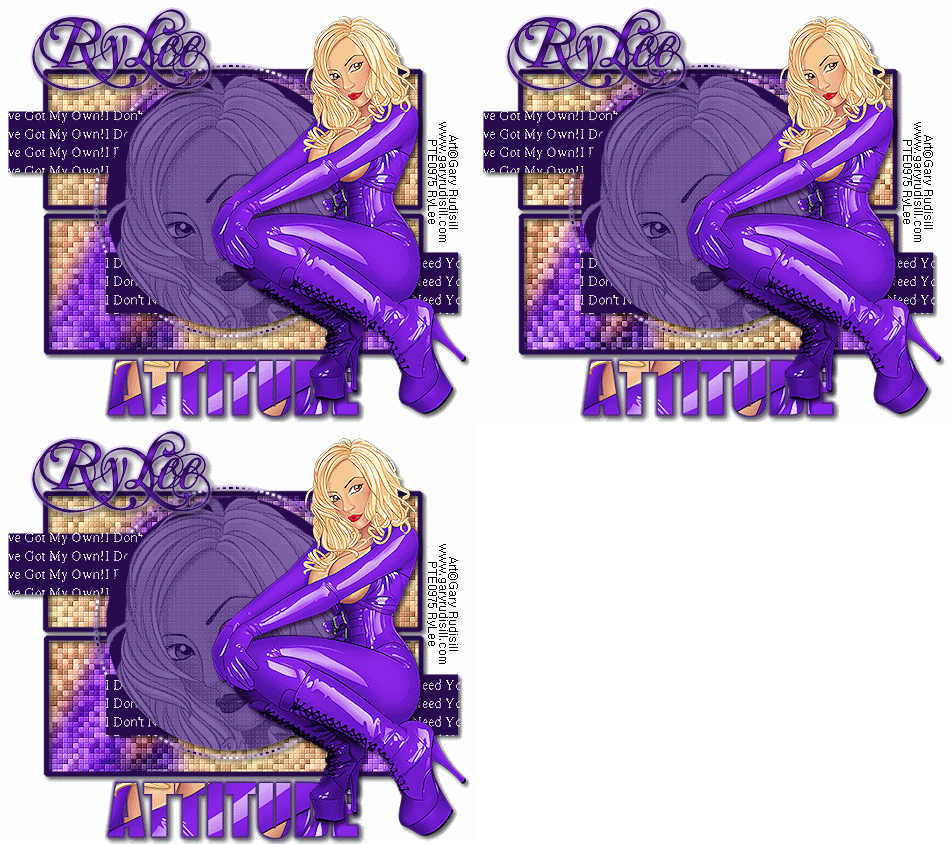
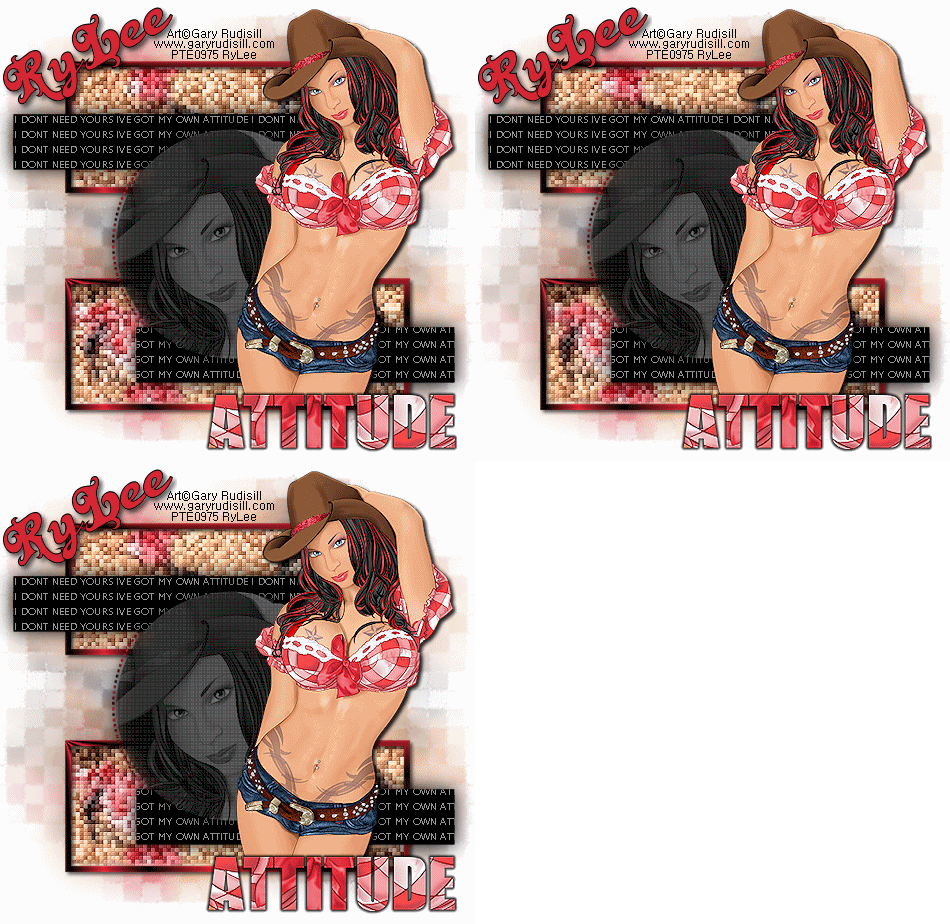
"ATTITUDE"
by RyLee
by RyLee
This tutorial was written by me, Joanie (aka RyLee) on May 26, 2011. This is my own creation and idea from my own little brain, and
any similarities to any other tutorial is purely coincidental.
This tutorial is for those who have a working knowledge of PSP and Animation Shop &
was written using PSPX3, but any version can be used.
Artwork ©Gary Rudisill
Do Not use his artwork without the proper License.
You can purchse this tube and more at PTE
PSP Tubes Emporium
~Supplies Needed:~
Tube of Choice
Template by Denny
of Denz Designz
template 157
~Plug Ins
Xero - Fritillary
Mura Meister - Copies
Penta.com - Dot & Cross
Eye Candy - Gradient Glow
~Let's Get Started~
Open the template, shift + D to duplicate it, close the original.
Delete the copyright info
Flood fill the bottom layer with white,
close off all layers except the bottom and the two rectangles.
copy/paste your tube of choice above the rectangle layers.
Effects, plugins/mura meister/copies/wallpaper(rotate)/enter
Adjust/blur/Gaussian blur/10, duplicate this layer once, hide both layers.
Highlight the bottom rectangle, select/select all/select float/invert. unhide one of the blurred tubed layers; delete on your keyboard; select/select none.
repeat this step for the 2nd rectangle, delete the black rectangles.
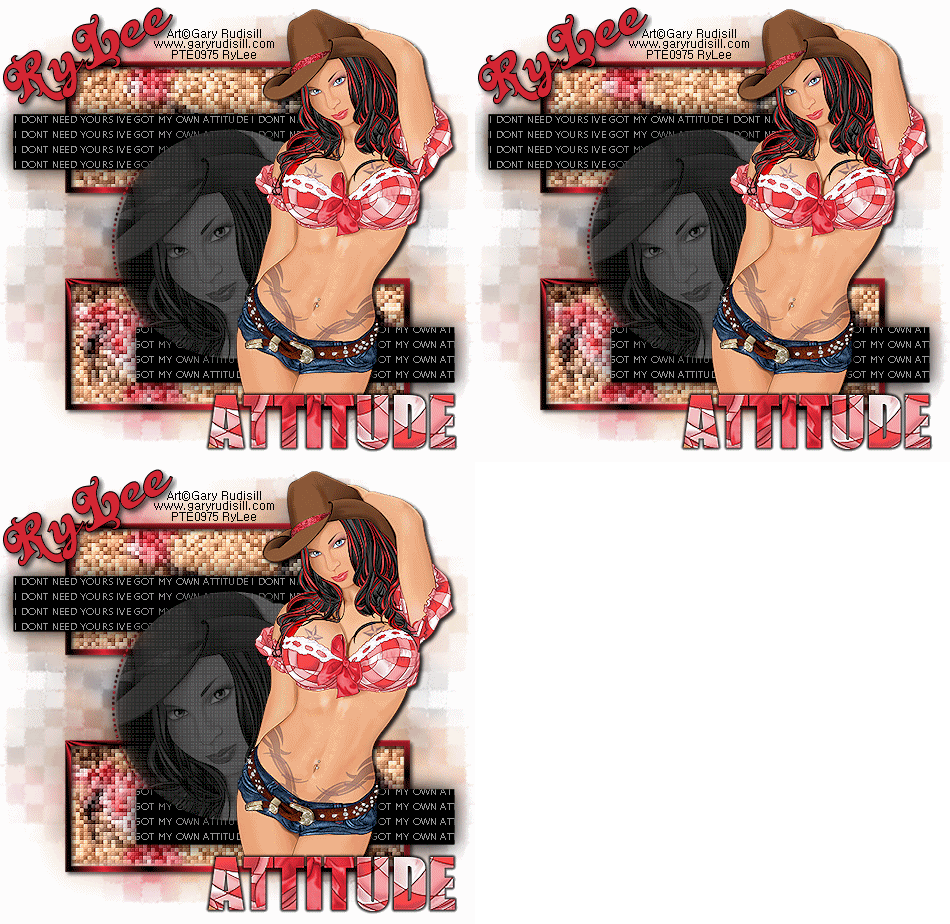
you can either keep your rectangles in the same position, or move them (see my 2nd tag for placement)
I always apply the crop tool to the size of your canvas to remove anything
left over.
highlight one of your rectangles, select/select all/float/defloat/modify/expand by 6, add new raster layer,
flood fill with color or gradient of choice, select/modify/contract by 6/delete select/select none. This will give you thin frame; repeat the above step 1 more time
for the remaining rectangle.
Add a drop shadow of choice.
Merge the blurred layers ONLY together;
Duplicate this layer 2 times for a total of 3.
Effects/Xero/Fritillary
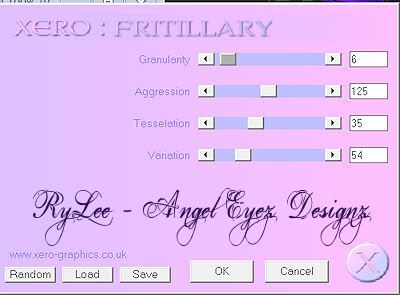
Highlight the 2nd, adjust your variation according to your liking. I usually go up by 10-15, enter.
Highlight the 3rd layer, again, adjust the variation. (I start with the first number, in this case 64), and go down 10-15, enter.
In your layer palette highlight the layer (thin strip 2); select/select all/select Float/select defloat/add new raster layer, flood fill with black or a dark color of choice;
Select/select none. Repeat this step for the layer Thin strip 1; delete the gray template layers for each thin strip.
Open a new blank canvas, 600 x 600, flood fill with a dark color.
with a font like Pixelette or something similar, I used Aparajita, size 20, stroke 0, anti-alias-off, type out "I Don't Need Your Attitude, I Got My Own"
or something you want to use, Objects/align/center of canvas/covert to raster layer.
Effects/Plugins/Mura Meister/Copies/tiling/change the TILE GAP to 1, enter
paste as new layer above the thin rectangles on your tag.
with the magic wand, click inside each of the thin strip layers, (make sure you highlight each one in the layer palette), highlight the word layer, delete on your keyboard. You should now
have words in both thin strips only; add drop shadow of choice to the rectangle layers.
Highlight the circle layer, select/select all/float/defloat/add new raster layer/flood fill with color of choice; add tube of choice, invert/delete on keyboard/select/select none.
delete your circle template layer.
On your tube layer you just added (circle), change it to Luminancy (L); reduce the opacity to about 40%, or whatever you choose.
Effects/plugins/Penta.com/Dot & Cross/amount 85/cross distance 5/cross width 2, apply.
Highlight the Dotted Circle layer, select/select all/select float/defloat/add new raster layer. choose a color or gradient of choice, you may want to zoom in so you can see the dotted circle, flood fill.
just an option, it's up to you and your liking, i moved the dotted circle layer down under the thin rectangle layers,
Select/select none.
I added a small Gradient Glow to this layer, drop shadow of choice.
Delete the dotted circle template.
The next layers are the brackets, i didn't use them, but you can if you want.
Follow the steps for the rectangles, using color, gradient, paper etc. of choice.
The next layer is the "Attitude" layer. You can do what you want too or what i did. Since I used a tube that had a close-up, I copied/pasted it above
the word layer (attitude). On the word layer, select/select all/float/defloat/invert, highlight the tube layer; delete on your keyboard; select/select none.
Delete the word template layer.
You can do whatever you want, I added a Gradient Glow to my "Attitude" layer,
drop shadow of choice.
Add your main tube of choice. Position into place, add a drop shadow of choice.
You should make any adjustments that you want too.
If you are going to resize, now would be the time to do that before you add your copyright. I don't know about you, but my copyright gets distorted
when I add it before resizing. Resizing is just an option, you do what you want, it's your tag!!
When resizing, make sure you change the pixels to 72 dpi per inch. Most templates are done at 300 dpi per centimeter. After resizing, I always
adjust/sharpen/ each layer. sometimes the layers tend to get distorted a bit.
new raster layer (top) add your artists copyright. make sure it's clean n clear.
pick out a font of choice, add a name.
If you don't want to animate, save your tag as desired...jpeg, png. etc.
~Animation~
Close off the 2nd & 3rd fritillary layers, right click on the top bar of the tag, copy merged and paste as a new animation in AS,
Back to PSP, close of 1st layer, unhide layer 2, copy merged, paste as after current frame;
repeat for the 3rd fritillary layer.
View your animation, once happy, file, save as.
Here is another tag using the same template, just moved things around and added a mask to the background.
Thank you for trying my tutorial!!! :)
If you have any questions, please contact me at rylee1966@gmail.com.
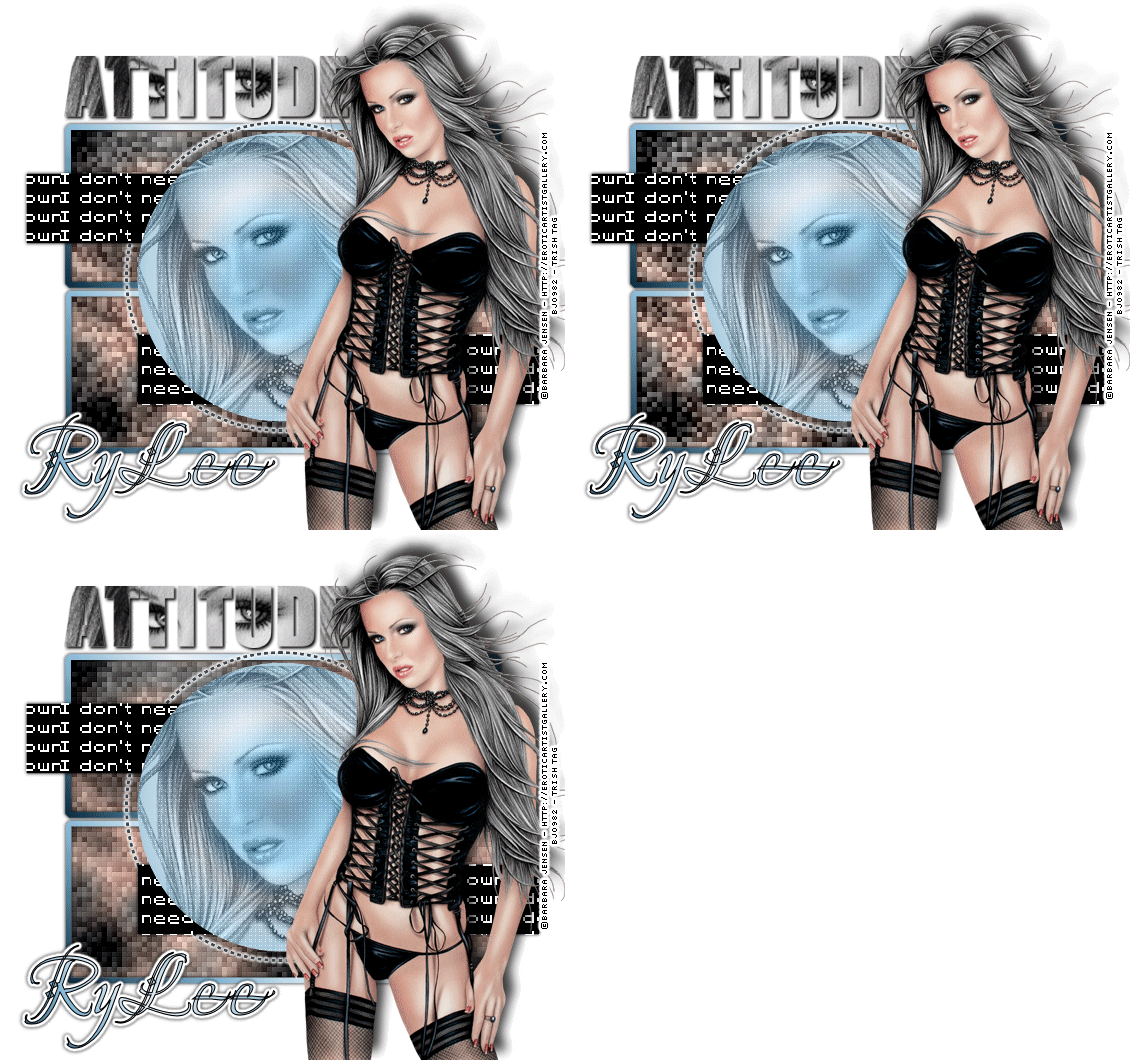
Thank Trish for testing this tutorial for me!!!
Here is what Trish made!!
Tuesday, May 17, 2011
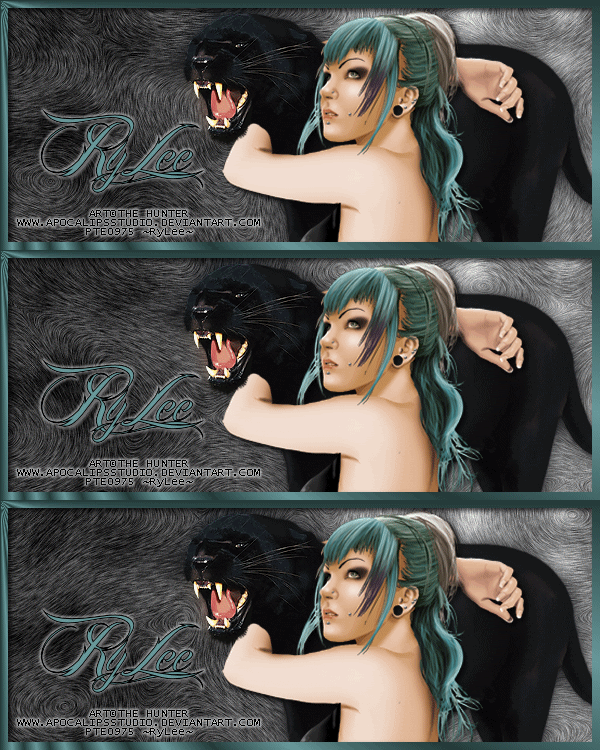
 Hunter Cazador newest tube "Black Panther"
7:19 AM | Posted by
Joanie |
Edit Post
made a quick animated tag using Hunter Cazador's aka "The Hunter" newest tube "Black Panther" available at PSP Tube Emporium.
Thanks for peeking! :)
Thursday, May 12, 2011
 "Yee-Haw Baby" image by Gary Rudisill
10:32 AM | Posted by
Joanie |
Edit Post
Gary Rudisill has a brand spanking new image now available at PTE, "Yee-Haw Baby". This image has soooo many layers and colors, pus tattoos, that your creativity is endless.
Go check out PSP Tubes Emporium for Gary's hot new tube!!!
Go check out PSP Tubes Emporium for Gary's hot new tube!!!
Subscribe to:
Comments (Atom)
About Me
- Joanie
- I'm better know as "RyLee" in the PSP Community. This is my little corner of the world where I share tags that I make in Paint Shop Pro/Animation Shop. I am self taught, about 9 years now. I learned by searching n searching for tutorials on how to make tags...finally it all sank in. I hold a license to use Barb Jensen, (my first license), CDO (CILM), Jose Cano, Up Your Art, PTE, AIL, My Tag Art, Pics for Designs....I know I'm forgetting one or two. I love pinup art, nudity does not bother me....we were all born with (@)(@). I love taking pictures, baking n cooking, looking at eyes....looking into someone's eyes... If you want to check out a few tuts that I wrote, please visit my other blog: www.tutorialsbyrylee.blogspot.com/ If you need me, contact me at: rylee1966@gmail.com

